

Every website owner should be concerned about the security of their WordPress site. You can do many things to keep your site safe, even though the WordPress core software is extremely secure and is regularly audited by hundreds of developers. For every WordPress Beginner, security is not just about eliminating the risk, reducing them is also an essential factor.
All the best WordPress security tips are included in this guide to help protect your site from hackers and malware. Even if you’re not a computer whiz, there are several steps you can take to protect your website from potential security threats.
Why is WordPress Security Important?
A hacked WordPress site can hurt your company’s revenue and image. Hackers can steal passwords and other personal information from your users, install malicious code, and disseminate malware.
In the worst-case scenario, you’ll be forced to pay ransomware to hackers to reclaim your website.
WordPress security is especially important if your website is run as a business. As a business owner, you’re responsible for protecting your business website in the same way that you’re responsible for protecting your physical store building.
Keeping WordPress Updated
WordPress is a free, open-source piece of software that’s regularly updated and maintained. WordPress is set up to install minor updates by default automatically. When it comes to major releases, you must manually initiate the upgrade.
WordPress also comes with thousands of plugins and themes that you can use to customize your website’s look and functionality. These plugins and themes are maintained by third-party developers, who also release regular updates to keep them up to date.
It’s critical that you keep your WordPress site up to date in order to maintain security and stability. Before continuing, you must ensure that your WordPress core, plugins, and theme are all up to date.
Strong Passwords and User Permissions
The most common WordPress hacking attempts make use of stolen credentials. Utilizing longer, stronger passwords exclusive to your website might make this theft more difficult.
Many people are reluctant to use strong passwords because they believe they’re difficult to remember. You might wonder how you’ll remember everything when there are so many different passwords, such as for business email accounts, web hosting, domain registrars, social media accounts, and the WordPress admin area.
The good news is that you won’t have to worry about remembering any passwords anymore with a password manager.
A password manager is a software program that stores all of your passwords and allows you to manage them all with a single master password. It also helps you create strong passwords when making new accounts, which are then stored on the cloud by the manager.
The most convenient feature of password managers is that they have auto-fill functionality built-in. You’ll never have to remember or enter any website information. Using your password manager app on all your devices is simple, and it can easily import any passwords stored in your browser.
LastPass is the most widely used password management application available. You can get started immediately with their free version, which includes all the features you’ll need. Access to advanced multi-factor options as well as sharing features are available by upgrading to the premium version.
LastPass is available for use on a variety of platforms, including Windows, Mac OS X, Linux, Apple, Android, and Blackberry devices. This means that no matter what device you use, LastPass will be there, and you’ll be able to sync all of your passwords with one click easily.
Provide access to your WordPress administration account only when necessary. If you have a big team or a large number of guest writers, be sure you understand WordPress’s user roles and capabilities before adding new user accounts and authors to your site.
The Role of WordPress Hosting
Your WordPress hosting service is the most important factor in ensuring the security of your WordPress site and blog. A good shared hosting provider will go the extra mile to protect their servers from common threats such as viruses and malware and constantly keep an eye on their network for any suspicious activity.
All reputable hosting companies have measures in place to protect against large-scale distributed denial-of-service (DDOS) attacks. In order to prevent hackers from exploiting a known security vulnerability in an older version of the software, they keep their server software, PHP versions, and hardware up to date. They have disaster recovery plans ready to be deployed, which allows them to protect your data in the event of a major disaster.
When you sign up for a shared hosting plan, you will be sharing the server resources with a number of other customers. Consequently, a risk of cross-site contamination exists, in which a hacker can use a neighbouring site to launch an attack against your website.
The use of a managed WordPress hosting service ensures that your website is hosted on an even more secure platform. In order to protect your website, managed WordPress hosting companies provide automatic backups, automatic WordPress updates, and more advanced security configurations to protect your website.
WordPress Security in Easy Steps
It’s totally understandable for a new WordPress user to be terrified by the idea of improving their WordPress security. This is especially true if you’re not technically savvy.
There are experts to assist thousands of WordPress beginners in hardening the security of their WordPress installations. There are just a few simple steps to follow to improve the security of your WordPress site with a few clicks (no coding required). You can complete this task if you know how to point and click.
Installing WordPress Backup Solution
Having regular backups is your first line of defence against any WordPress attack. It’s important to remember that nothing is completely secure. If government websites can be hacked, yours can, too.
Backups let you quickly restore your WordPress site if something goes wrong. WordPress backup plugins are available in a variety of price ranges, both free and paid. When it comes to backups, the most important thing to remember is that you must regularly save full-site backups to a secure off-site location (not your hosting account).
It’s highly recommended to store your backup on a cloud service such as Amazon S3 or Dropbox or a private cloud such as Stash to ensure maximum security.
Depending on how frequently you update your website, once-a-day backups or real-time backups may be the most appropriate setting for you. Fortunately, using plugins such as Updraft Plus or Blog Vault, you can easily create backups. They’re both dependable and, perhaps most importantly, simple to use (no coding needed).
The Best WordPress Security Plugin
Once backups are created, the next step is to set up an auditing and monitoring system that will keep track of everything that occurs on your website in real time. This includes file integrity monitoring, failed login attempts, malware scanning, and other similar features and functions.
The best free WordPress security plugin, Sucuri Scanner, can take care of all of these issues for you. Installation and activation of the free Sucuri Security plugin are required.
Once the plugin has been activated, you must navigate to the Sucuri menu in your WordPress administration. The first thing you’ll be asked to do is create a free API key. Audit logging, integrity checking, email alerts, and other important features will be enabled as a result of this.
The next step is to navigate to the ‘Hardening’ tab in the settings menu – click on it to complete the process. After you’ve gone through all of the options, click on the “Apply Hardening” button.
These options assist you in securing the critical areas that hackers frequently target during their attacks. The only hardening option that requires a paid upgrade is the Web Application Firewall.
Following the hardening process, the default plugin settings are sufficient for the majority of websites and don’t require any modifications. Customizing ‘Email Alerts’ is the only feature that we recommend changing. With the default settings, your inbox can be overflowed with emails. Experts recommend that you receive alerts for important actions such as plugin changes, new user registration, etc. You can customize the alerts by going to Sucuri Settings » Alerts and editing the settings.
Enable Web Application Firewall
Using a WordPress firewall plugin (also known as a web application firewall or WAF), you can create a protective barrier between your website and all incoming traffic. Website traffic is monitored by these web application firewalls, which identify and block many common security threats before they can reach your WordPress site.
Aside from significantly increasing the security of your WordPress site, web application firewalls are frequently used to speed up and improve the performance of your website.
A web application firewall (WAF) is the most straightforward method of protecting your site and feeling confident about your WordPress security.
A website firewall prevents all malicious traffic from reaching your website before it even gets there.
- DNS Level Website Firewall – These firewalls route your website traffic through their cloud proxy servers, only sending legitimate traffic to your web server.
- Application Level Firewall – These firewall plugins examine traffic after it arrives at your server but before it has a chance to load the majority of WordPress scripts. When it comes to reducing server load, this method does not perform as well as the DNS-level firewall.
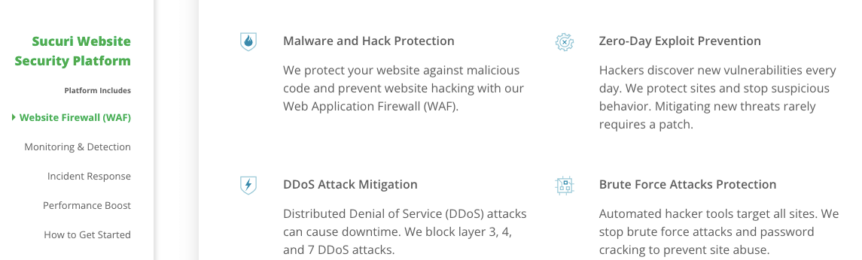
Sucuri is used by experts and is highly recommended to all WordPress users. It’s the most trusted website security provider for WordPress websites, providing DNS-level firewall, intrusion and brute force prevention, malware and blacklist removal services, along with other security-related services.
All of your website traffic is routed through their cloud proxy servers, which scan each request as it comes through. Genuine traffic is allowed to pass through, but all malicious requests are denied access to the network.
Sucuri also enhances your website performance by reducing server load through caching optimization, website acceleration, and Anycast CDN deployments. Your website is protected against SQL Injections and all known attacks. Because repairing hacked websites is an expensive endeavour, this is a fairly comprehensive warranty.
Sucuri is not the only DNS-level firewall provider available on the market today – Cloudflare is the other well-known competitor in this space.
Move Your WordPress Site to SSL/HTTPS
You should encrypt the data transfer between your website and your users’ browser with SSL (Secure Sockets Layer). Someone attempting to sniff around and steal information will have a more difficult time with this encryption.
When you enable SSL, your website will switch from using HTTP to HTTPS, and you’ll see a padlock symbol next to your website address in the browser. Using SSL/HTTPS is highly recommended on the internet. It is, however, a requirement for any website that collects user data such as usernames, passwords, or credit card numbers.
An SSL certificate is a must-have if you have an eCommerce site, a membership website, or any other website that requires users to log in. You must have an SSL/HTTPS-enabled website in order to accept online payments.
It’s not just for security – an SSL certificate positively impacts your brand’s perception. Google also recommends using SSL, and research shows that SSL-enabled websites rank slightly better in search results.
SSL certificates were typically issued by certificate authorities, and their prices ranged from $80 to hundreds of dollars per year, depending on the type of certificate. Because of the additional costs, the majority of website owners have chosen to continue using the insecure protocol.
To address this issue, a non-profit organization known as Let’s Encrypt decided to provide free SSL Certificates to website owners. Their project has received support from companies such as Google Chrome, Facebook, and Mozilla.
Now, more than ever, it’s possible to begin using SSL for all of your WordPress websites. A free SSL certificate for your WordPress website is now being offered by a large number of hosting companies.
You can purchase a domain name from Domain.com if your hosting company does not provide one. They have the most competitive and dependable SSL deal available on the market.
DIY WordPress Security
Everything we’ve talked about so far should put you in a good position to achieve success. However, as is always the case, there is more you can do to improve the security of your WordPress site. Some of these steps may require coding skills.
Change the Default “Admin” Username
WordPress’s default administrator username was “admin” in the early days of the platform. Because usernames account for half of all login credentials, hackers were able to conduct more effective brute-force attacks as a result.
Fortunately, WordPress has changed this and now requires you to choose a custom username when you first install the platform.
1-click WordPress installers, on the other hand, continue to use the default admin username of “admin.” This indicates that you should consider changing your web hosting provider if you notice this.
You have three options for changing your username because WordPress does not allow you to do so by default:
1) Create a new admin username and remove the old one from your system.
You can easily change your WordPress username by creating a new user with the administrator role and the desired username. You must, however, use an email address that is distinct from the one associated with your existing account.
- Log out of WordPress and then log back in with the new user account you just created after you’ve completed the process of creating the new account.
- Go to the Users » All Users page and click Delete under your old username, which will remove it from the site entirely.
- WordPress will ask you what you want to do with any content that was created by the old username if you delete it.
- Select the newly created user and then click Attribute all content to.
- Delete the old user account by clicking Confirm Delete.
2) Use a username changer plugin.
A plugin is another easy way to change your WordPress username. Worried about using too many plugins? You can safely delete them after changing your WordPress username.

- Install and activate the Easy Username Updater plugin.
- If you want to change your username, go to Users » Username Updater and click the Update link next to it.
- Enter the new username and click Update Username.
- If you want to notify the user about the change, first check the Notify User box.
3) Update your username directly from phpMyAdmin.
To use this method, you must make changes directly to the WordPress database. Because it’s so easy to make a mistake and break your WordPress site, it’s strongly advisable to take action. However, in some cases, such as when you forget your WordPress username and email address and are locked out, you may not have an option. This can be done by accessing phpMyAdmin from your web hosting dashboard and selecting the Databases option.
- If your WordPress database is not already selected, you will need to do so.
- Your WordPress database tables should now be visible to you. The wp_prefix is selected for each table name in the WordPress database by default. Changing the prefix of the database may be the cause of the problem you’re having.
- The WP users table can be found on the left side of the screen by clicking there.
- Changing a username is as simple as clicking the Edit link next to the current username in the list.
- The user login field will now allow you to enter a new username.
- In order to save your new username, click the Go button at the bottom of the screen.
Disable File Editing
WordPress includes a code editor that allows you to make changes to your theme and plugin files without leaving your WordPress administration area. This feature, if used incorrectly, can pose a security risk, which is why it’s recommended that you turn it off completely.
This can be accomplished with relative ease by including the following code in your wp-config.php file.
Alternatively, you can integrate the Hardening feature of the free Sucuri plugin mentioned above.
Disable PHP File Execution
Disabling PHP file execution in directories where it isn’t needed, such as /wp-content/uploads/, is yet another way to improve the security of your WordPress installation.
This can be accomplished by opening a text editor such as Notepad and pasting the following code:
<files *.php>
Deny from all
</files>
This file should be saved as .htaccess and uploaded to your website’s /wp-content/uploads folders using an FTP client to complete the process.
Limit Login Attempts
WordPress, by default, allows users to attempt to log into their accounts as many times as they want. The result is that your WordPress website is vulnerable to brute-force attacks. Hackers attempt to crack passwords by attempting to log in with a variety of different combinations of characters.
By limiting the number of failed login attempts a user can make, this can be easily resolved. If, on the other hand, you do not have a firewall configured, then proceed with the steps below.
- Install and activate the Login LockDown WordPress plugin.
- After activating the plugin, navigate to the Settings » Login LockDown page to configure it.
Add Two-Factor Authentication
Users must log in using a two-step authentication method to benefit from this technique. One step involves entering your username and password, while the other requires you to authenticate using a separate device or app. The first step is straightforward.
Most popular online services, such as Google, Facebook, and Twitter, allow you to enable your accounts to manage your information better. Additionally, you can integrate the same functionality into your WordPress website.
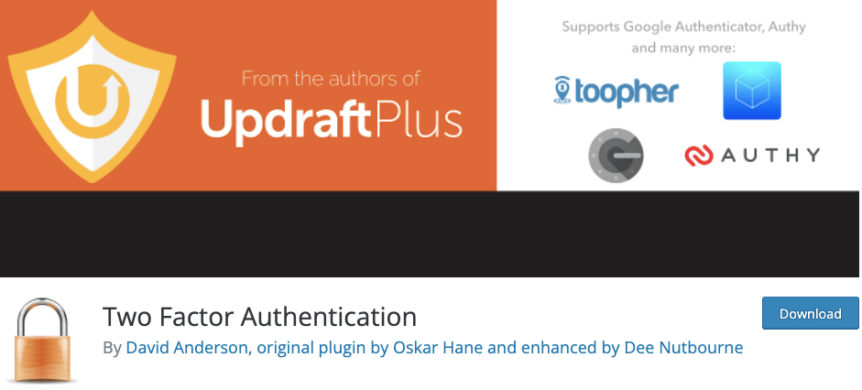
- To begin, you must install and activate the Two Factor Authentication plugin on your website.
- Following activation, you must navigate to the Two Factor Authentication link in the WordPress admin sidebar.
- The next step is to download and launch an authenticator application on your smartphone. You can choose from a number of different options, such as Google Authenticator, Authy, and LastPass Authenticator.
The LastPass Authenticator or Authy are both excellent choices because they both allow you to back up your accounts to the cloud. This is extremely useful in the event that your phone is misplaced, or reset, or if you purchase a new phone. All of your account login information will be easily recovered.
- After you’ve opened your authenticator app, click on the Add button to proceed.
- You’ll be asked whether you want to manually scan a site or scan a barcode instead. Select the scan bar code option from the plugin’s settings page, and then point your phone’s camera at the QR code displayed on the settings page.
That’s all there is to it; your authentication app will now remember it. The next time you log into your website, you’ll be prompted to enter the two-factor authentication code after entering your password. Simply launch the authenticator app on your phone and enter the code on the app’s screen.
Change WordPress Database Prefix
The WordPress database is prefixed with the prefix wp_ by default, which applies to all tables in your WordPress database. In the event that your WordPress site is using the default database prefix, hackers will have an easier time figuring out what the name of your table is. This is why WordPress experts believe it should be changed.
WordPress Database is similar to the brain of your entire WordPress site because it stores all of the information about your site, making it a favourite target for hackers. Spammers and hackers use automated scripts to carry out SQL attacks. Unfortunately, many people forget to change the database prefix when they are installing WordPress, resulting in a broken installation. Hackers will find it easier to plan a large-scale attack by targeting the default wp_prefix as a result. Changing the database prefix is the most effective way to protect your database if you’re creating a new website. This is a simple process that anyone can perform. However, it only takes a few simple steps to properly change the WordPress database prefix for your existing site without causing it to completely malfunction.
Back up your WordPress database before attempting any of the steps. We recommend using the BackupBuddy plugin to keep daily backups of your site. The next step is to send your visitors to a maintenance page while your site is being repaired.
- Open your WordPress root directory’s wp-config.php file. Replace wp_ with something else like this in the table prefix line wp a123456_
- If you don’t have access to phpMyAdmin, you’ll need to go into your database and make changes to the table names. phpMyAdmin can be found in your cPanel if you’re using WordPress hosting through cPanel.
- Any other fields that use wp_ prefixes in the options table must be searched for and replaced.
You can now begin testing the website. Just to be on the safe side, you’ll want to take a new backup of your database.
Password Protect WP-Admin and Login
Hackers are normally able to request your wp-admin folder and login page without any restrictions in most cases. This gives them the opportunity to test their hacking skills or launch DDoS attacks.
On the server side, you can implement additional password protection, which will effectively prevent those requests from being processed. Adding a password to your WordPress admin directory helps to increase the security of the most important entry point to your website’s administration.
Your WordPress administration dashboard serves as the nerve center of your WordPress website. Posts and pages will be published here, as well as the ability to customize your theme and install WordPress plugins.
Most of the time, when hackers attempt to gain access to your website, they do so via the wp-admin screen. By using a secure password and restricting the number of login attempts, you can assist in protecting your website against potential attacks. Password-protecting your admin directory is a clever way to add an additional layer of password protection to your website’s security.
Disable Directory Indexing and Browsing
When your web server cannot find an index file (for example, a file named index.php or index.html), it will automatically display an index page displaying the contents of the directory. The information revealed could make your site vulnerable to hack attacks by providing the information necessary for an attacker to exploit a vulnerability in a WordPress plugin, theme, or your server in general.
Directory browsing can be used by hackers to discover if you have any files that contain known vulnerabilities, and then they can exploit these files to gain access to your computer. It can also be used by others to look through your files, copy images, figure out your directory structure, and gather other information about your computer. The fact that you’re turning off directory indexing and browsing is highly recommended for this reason.
It takes only one line of code to disable directory browsing in WordPress, which can be found in the .htaccess file of your WordPress website’s root directory. To make changes to the .htaccess file, you must first connect to your website through an FTP client.
Once you’ve connected to your website, you’ll notice that a .htaccess file has been created in your site’s root directory. Since the .htaccess file is hidden, if you’re unable to locate it on your server, check to see if you have enabled your FTP client’s ability to display hidden files.
You can make changes to your .htaccess file by saving it to your computer’s desktop and editing it with a text editor such as Notepad. In your .htaccess file, at the end of the WordPress-generated code, simply add the following line at the bottom:
Options -Indexes
Now, save your .htaccess file and re-upload it to your server using an FTP client of your choosing. Searching for a directory index on your website will be disabled on your WordPress site, and visitors who attempt to do so will be redirected to the WordPress 404 error page.
Disable XML-RPC in WordPress
In WordPress 3.5, the XML-RPC protocol was enabled by default because it facilitates the integration of WordPress sites with web and mobile applications. Because of its robustness, XML-RPC has the potential to increase the effectiveness of brute-force attacks significantly.
If a hacker wanted to try 500 different passwords on your website, they would have to make 500 separate login attempts, each of which would be caught and blocked by the login lockdown plugin. However, with the login lockdown plugin, this is no longer necessary.
A hacker, on the other hand, can take advantage of the system thanks to XML-RPC. To test thousands of passwords with only 20 or 50 requests, use the multicall function. This is why if you’re not using XML-RPC, then you should disable it.
Automatically Log Out Idle Users
Users who are logged in may find themselves wandering away from their screens, posing a security risk. Someone can take control of their session and change their passwords or make changes to their account information.
This is why many banking and financial websites automatically log out a user who has not logged in for a period of time. The same functionality can be implemented on your WordPress website as well if you choose to do so.
Installing and activating the Inactive Logout plugin will be required for this to work. To configure the plugin settings, go to the Settings » Inactive Logout page after it has been activated.
Add Security Questions to WordPress Login
Many financial institutions and large corporations require you to set up security questions for your account in order to verify your identity when you open a new account. You can do the same thing to increase the security of your WordPress website.
Numerous approaches can be used to protect the WordPress administration area from unauthorized access. On the other hand, if you run a multi-user or WordPress membership site, it becomes more difficult to strike a balance between security and user experience.
Including security questions on your login screen may be beneficial. In order for your users to be able to log into your WordPress website, they will be required to answer one or more questions that other users should not be able to answer.
Two-factor authentication, also known as 2FA, is an alternative. This option is more secure, but it necessarily requires a little more effort during the setup process.
Scanning WordPress for Malware and Vulnerabilities
If you have WordPress security plugins installed, those plugins will check your site on a regular basis for malware and signs of security breaches. If you don’t have a WordPress security plugin installed, you should install one.
You should manually run a scan on your website if you notice a sudden drop in website traffic or search engine rankings. If you don’t have a WordPress security plugin, you can use one of the malware and security scanners available online.
Running these online scans is quite simple; you simply enter your website URLs, and their crawlers will go through your website looking for known malware and malicious code, which is quite straightforward.
Keep in mind that the majority of WordPress security scanners are limited to scanning your website. A hacked WordPress site cannot be cleaned by them because they don’t have the necessary tools.
Fixing a Hacked WordPress Site
Any website can be hacked no matter what type of platform you’re using – WordPress, Drupal, Shopify, etc.. Redirects can tarnish your reputation to any bad websites, and your entire site data can be lost if your WordPress site is hacked. You may also lose your search engine rankings and expose your readers to viruses.
If you’re running a business on your website, security should be a major concern. That’s why it’s so important to use reputable WordPress hosting. You should definitely use managed WordPress hosting if you can afford to do so.
WordPress Vulnerabilities
Attacks on the Internet are costly – both in time and money. If your site visitors are affected by the attacks, your authority and reputation could be threatened.
The number of threats your site may face on a daily basis is nearly impossible to estimate, but it is important to recognize and understand WordPress-specific issues should you fall victim to one of these threats. Preparation for one issue can shield you from another because many of these concerns are linked.
WordPress sites are particularly vulnerable to website attacks for a variety of reasons. The default WordPress backend login page is straightforward to locate. It’s as simple as adding /wp-admin or /wp-login.php to the end of the URL and you’ll be able to access the login page. Attackers can easily gain access to your site if you don’t customize the default login page.
The WordPress user bears some responsibility in the event of an unauthorized WordPress login. Using the default “admin” username and a simple, common password, attackers can easily gain access to the system.
Backdoor
To gain control of your WordPress website, you need a backdoor to gain access to the site without being spotted by the owner.
Even if the website owner has removed the hacker’s backdoor, the site can still be accessed. This is how the system can still be hacked even after it has been cleaned up on the site.
Once they’ve gained access to your website, a hacker can use a backdoor to do the following:
- Malware hacks, such as redirecting malware
- Become an unnoticed WordPress administrator
- Execute the PHP code that they send through a browser
- Gather personal data for spam
- Use your site to send spam emails that appear to originate from you
Pharma Hacks
Hackers use WordPress Pharma Hack (also referred to as the Google Viagra Hack) to tamper with a website’s content and search engine results. A user agent from Google’s crawler causes the spam to appear (Googlebot). Aside from that, eradicating the infection can be difficult and, if done incorrectly, will keep reappearing. Pharma hack is a WordPress vulnerability that takes advantage of security flaws. In order to distribute pharma content to search engines and visitors, the attacker exploits WP websites that are vulnerable to attack. Most of these attacks target search engines like Google or Bing in order to promote illegal pharmaceutical businesses.
The title tag is overridden, and spam links are inserted into the content of your most valuable and highest-ranking pages in this hack. Search engines can only see the altered title tag and spam links using cloaking.
Brute Force Login Attempts
A brute force attack aims to gain access to the WordPress admin panel by obtaining valid login credentials. The attacker will have complete control of the website if they gain access to the admin panel. It’s possible for hacked WordPress sites to be used in a variety of ways, from defacing to stealing user credentials to hosting harmful files or injecting malicious code into the site’s pages.
When no other approach works, this one is employed. These cybercriminals have a particular interest in password cracking and can easily gain access to private information using this technique. In part, this is due to the fact that so many people don’t use strong passwords.
Malicious Redirects
Malicious websites, phishing pages, and malware websites can all be redirected as a result of the “WordPress Malware Redirect” or “WordPress Redirect Hack”. The code injected into your WordPress database is most likely the cause of the redirection of your WordPress site to another site.
It’s not uncommon for us to hear questions like, “Why is my site redirecting me to another site?” If your website is being redirected to a spam or phishing site, the most obvious explanation is that WordPress has been hacked and infected with malware.
A malicious person Hacked WordPress Site A redirect occurs when a visitor is taken to another page other than the one he requested instead of the page he originally requested on the site. Typically, hackers use a specific malicious code to redirect your website to a pornographic or scam website in order to harm your website. Tricks that are frequently used include:
- Creating a fake administrator account on your website
- Malicious code into your WordPress blog or website
- Invoking PHP scripts
Cross-site Scripting (XSS)
WordPress XSS (cross-site scripting) is an attack that takes advantage of a vulnerability in WordPress to inject malicious code or malware into a website. It’s a type of website security vulnerability that occurs in applications that are not properly secured against XSS attacks.
For example, a malicious code in a scripting language is injected into a vulnerable WordPress website, for example by posting an ad in a forum that redirects the user to an illegitimate site (phishing) or stealing information (cookies).
Attackers hope to steal the other user’s cookies, session tokens, and other identifying information. A cookie-stealing attack is the most common use of this technique.
Denial of Service
DoS attacks are designed to prevent website administrators and visitors from accessing a site as a result of an attack on its network infrastructure. This is accomplished by flooding a targeted server with so much traffic that it crashes, thereby bringing down all websites hosted on it. Eventually, the server and the websites it hosts are restored, but the reputation of the websites that were attacked may be difficult to reestablish in the future.
These attacks are frequently carried out from multiple machines at the same time (forming a botnet), obscuring the traffic’s origin and increasing the spam volume. This is referred to as a distributed denial-of-service (DDoS) attack, and it is significantly more serious.
Keep Your WordPress Secure
Thousands of website domains are being hacked, and millions of identity theft cases resulting in financial resources are reported annually. Therefore, it is highly critical that small business owners protect their information to prevent significant losses. With WordPress being open-source, hackers and criminals can easily steal your website domain name, hack your bank accounts, and even commit crimes for which you may be held liable.
Experts highly recommend using an Identity Theft Protection Service like Aura to help you secure your internet connection with high-end encryption. It not only protects your data but is best for the people who connect their WordPress profile to the available public WiFi and network services for their work.
With the experts’ recommendations, always follow WordPress security best practices to ensure the safety of your website domain, business, and personal information.